When you start learning GDL programming, the first objects you make are usually not too complicated, with short scripts. But it’s never too early to get some practice in code styling and code structuring.
There are 2 very useful ways to make your code organized:
- use subroutines
- use macros
Subroutines
When the object requires the same piece of code more than once (just think about the 4 legs of a regular table), putting the redundant code section into a labeled subroutine saves you space (less lines of code), and saves you time, when you want to modify that specific piece of code later (you only have to change the script in one place, don’t have to look for it anywhere else).
A subroutine:
- is a labeled piece of code, placed to the end of the current script (usually after the “end” statement). Giving a descriptive name to the subroutine helps in understanding the code better as well.
- can be a simple function (a leg of a table, a piece of a on a sofa, etc.), called as many times as necessary within a script
- can be just a piece of code you want to use more than once (not necessarily a complete function)
- can be a piece of code you only use once, but you want to show the main structure of the object, using named subroutines (so your code may look a lot like other programming languages)
The subroutine is placed after the “end” statement of the code. End literally means end, so if you don’t have a reference line (gosub “subroutineName”) in your code, the sub will never be executed.
Example:
  ! transformations to go to the position of the 1st leg
  add legWidth/2, legWidth/2, 0
  ! draw the 1st leg with subroutine
  gosub "oneLeg"
  ! return to origo, emtpy transformation stack
  del 1
  add A - legWidth/2, legWidth/2, 0
  ! call sub for 2nd leg
  gosub "oneLeg"
  del 1
  add A - legWidth/2, B - legWidth/2, 0
  ! call sub for 3rd leg
  gosub "oneLeg"
  del 1
  add legWidth/2, B - legWidth/2, 0
  ! call sub for 4th leg
  gosub "oneLeg"
  del 1

  end

  ! ------------------------------------------------------------
  "oneLeg":
  ! this sub is drawing a leg for the table
  ! ------------------------------------------------------------
	  block...
	  sphere...
  return
The code is executed in this order:
- code interpretation reaches gosub “subName” statement
- code jumps to the sub called “subName” after the end statement, and continues to run in the subroutine’s script
- interpretation reaches the end of the sub at return statement, so the program jumps back to the next line after the gosub statement, and executes forward linearly, until the next gosub or other conditional control statement
Some style guide recommendations:
- if a variable is only used in the sub, the name should start with double underscore (“__subVariableName”)
- if the sub is long, and does not fit your screen, try to make smaller sections by dividing it. A good sub is easy to take in by the eye.
- try to give descriptive names to the label: (bad -> “sub1”, “1000”, good -> “tableLeg”)
- put some comments into the sub about its function. Better to explain everything when the concept is fresh. You will be very grateful for your foresight while fixing bug in a code you have not seen a long time.
Macros
A macro is a special kind of library part (remember the Components of a libpart lesson of this tutorial), which usually does not contain a whole object, only a well-separable function or structure of the caller object or objects.
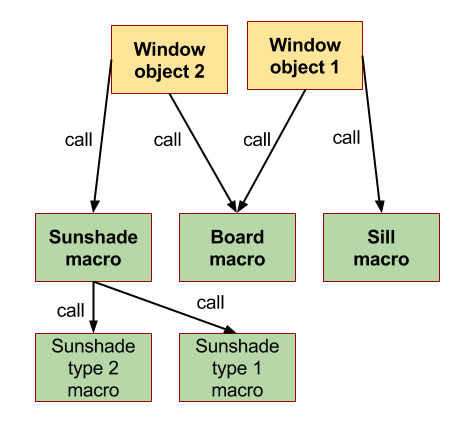
The usual example for the macro concept is the window (as caller) and board (as macro) connection: the window takes care of the wallhole, frame and sash, and when the board is needed, the window just gives a “call”. The board macro takes care of every aspect of a board: 3D model, 2D symbol, user interface tabpage for settings, parameter connections and value lists.
Macro elements are not placeable on the floor plan directly, they do not appear in the Settings Dialog tree, but are still part of the library.
Since they are not placeable, the parameters of a macro are out of reach for the user, and are not stored in the planfile, neither.
The macro parameters are getting their current value from the caller object, so if you want to make a macro function parametric, the caller object must contain the same parameters for the function as the macro (the name may be different, see later).
To use the functionality of a macro object, one must refer to it by the statement call “macroName” parameters, followed by either the all keyword, or a list of equations in the script of the caller object. The equations have 2 sides:
- the right side of the equations contain the values/variables/parameters of the caller object
- the left side contains the parameters of the macro (which you want to give a certain value)
The values travel from right to left, from caller object to macro object. If you do not assign a value from the caller in the call statement to a macro parameter, it will be used with its default value.
The script interpretation goes like this:
- caller object’s script reaches call statement
- parameter transfer happens from caller to macro
- script interpretation jumps to the macro’s correspondent script (if the macro was called from the 2D of the caller, the Master script of the macro will be evaluated first, then the program continues with the 2D script of the macro).
- reaching the end of the macro-script, the program jumps back to the next statement after the call command of the caller object, and continues to run there line-by-line.
Important to note: the active transformations before the macro-call stay in effect when the macro script runs, placing the macro’s global coordinate system into the local coordinate system position of the caller object. Transformations inside the macro script affect only the macro items, they do not influence the items of the caller object placed after the macro return point.
Lets take a look at call some options.
Transferring all parameters
call "macroName" parameters all
This is the “lazy” way: any parameter of the macro with a corresponding name to an active variable (not parameter!) of the caller object is filled with the value of the variable. Macro parameters with no twins remain filled with their default value.
The disadvantage of this method: any change in variables or macro parameter structure can cause unplanned changes in macro behavior. When dealing with lots of parameters, there is no easy way of mapping the transfer of values.
Controlled parameter transfer
To have more control of the value-transfer, but letting the automated function handle the less important values, a combination of all and equation-list can be used:
call "macroName" parameters all macroParam1 = value1,
				macroParam2 = value2,
				macroParam3 = value3
Put the value-parameter pairs into the list which you want to keep your eyes on, or the ones which you want to assign different values.
Of course, this method is still not the best for keeping a track of value movements, unexpected macro behavior may happen, if some values change without you noticing it.
To be on the absolutely safe side, put every value transfer into the list, and lose the all keyword:
call "macroName" parameters macroParam1 = value1,
			macroParam2 = value2,
			macroParam3 = value3
This way you will know exactly which values have found their way into the macro. Highly recommended by GRAPHISOFT.
Although in the script we use the name of the macro object (programmer friendly reasons), it is identified by its GUID by ARCHICAD: the caller object has a list containing the called macro GUID-name pairs, so ARCHICAD takes the name from the call statement, looks it up in the object’s macro ID list, and from that moment, the macro is only identified by its GUID. When saving a new macro, there can be no other object with the exact same name loaded in the active library. In an assembled library there can be more objects with the same name (not very elegant, but works), the previous statement is only true when saving a new macro/object.
Returning values from a macro
Starting from AC 10, it is possible to receive values from the macro.
In the macro, set up a list of returned values after the end statement:
_reValue1 = value2
_reValue2 = 3

end _reValue1, _reValue2
In the caller object, enhance the macro call with the returned_parameters section:
call "macroName" parameters macroParam1 = value1,
			macroParam2 = value2,
			macroParam3 = value3,
			returned_parameters _reValue1, _reValue2
It is strongly advised to keep the number, order and type of returned variables the same on both sides of the call.
Array type variables
Note: the number of possible returned elements is limited at 32767 items.
Summary of macros
- a full functionality with preferably all aspects included
- a macro object can call further macro objects
- name corresponds with the function
- only parameters existing in the macro can receive values from the caller object
- global parameters are available in the macro as well
- the macro is identified by the GUID-name pair
- a macro can have different subtype than the caller object, but usually it is more convenient to use the same subtype (depending on the number of used subtype parameters. If there are too many unused subtype parameters in a macro, using a subtype higher up in the hierarchy with less predefined parameters may be more useful for the macro)
Macro call examples:
Create a new object (palceable, “myBlockObject”) and a new macro (not placeable, “myBlockMacro”). Add 2 extra parameters to both: “nBlocks” (Integer) and “matBlock” (Surface):


In 3D script of macro:
material matBlock
for i = 1 to numBlocks
    block A, B, 1
    addx A*1.2
next i
del numBlocks
In the caller “myBlockObject”, try the different parameter transfer methods, and see the results:
Example 1:
transferring all existing parameters
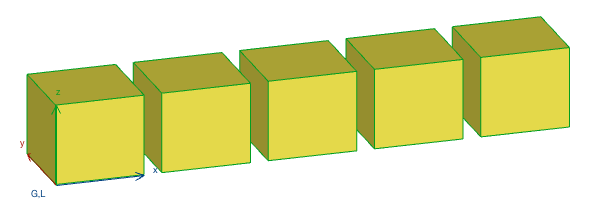
call "myBlockMacro" parameters all
Result (depending on the surface you set in the object):

Example 2:
transferring number parameter only
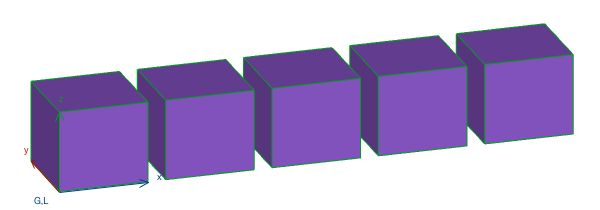
call "myBlockMacro" parameters numBlocks = numBlocks
Result (depending on the surface you set in the macro):

Example 3:
setting numBlocks with constant, assigning current object parameter value to matBlock
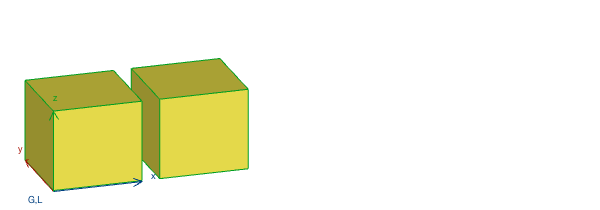
call "myBlockMacro" parameters  numBlocks = 2,
				matBlock = matBlock
Example 4:
setting matBlock with constant, assigning current object parameter value to numBlocks, modifying size A in macro
call "myBlockMacro" parameters  A = A/2,
				numBlocks = numBlocks,
				matBlock = 79
Example 5:
transferring all parameters except B, and modify it to half
call "myBlockMacro" parameters all B = B/2


