Example object can be downloaded here.
From ARCHICAD 20 a new method is available for the UI_INFIELD commands. Setting the method to 9 provides different picture positioning compared to method 3 on the User Interface.
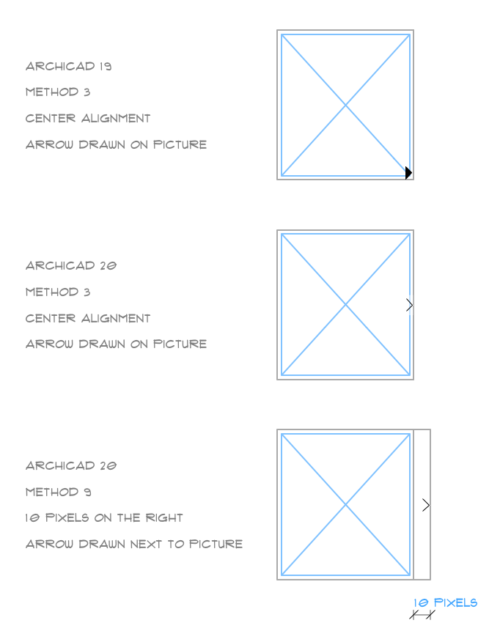
In ARCHICAD 19 and earlier versions the popup method positioned the selected value’s picture to the center of the control dimensions and displayed an arrow on bottom-right, within the picture area (causing overlays in some cases).

From ARCHICAD 20 the position of the arrow has been changed to middle-right on the infield, while the overlaying and picture positioning has not been changed.

From ARCHICAD 20 a new method (9) has been introduced to avoid the arrow-overlay of the picture area. This method displays a 10 pixel wide bar at the right of the infield for the arrow, and positions the picture to the center of the remaining space.

Differences in the popup method appearance:

The recommended method for popups is method 9. Infields using method 3 can be easily rewritten to method 9 without changing the used picture:
_method        = 3
_yPosition     = 10
_imageWidth    = 77
_imageHeight   = 85

! 3 pixels border
_infieldWidth  = 82
_infieldHeight = 90

ui_infield{3} "iSymbolType", 10, _yPosition, _infieldWidth, _infieldHeight,
	_method, "BedSymbolTypes", 4, 2,
	_infieldWidth, _infieldHeight, _imageWidth, _imageHeight,
	1, "", 1,
	2, "", 2,
	3, "", 3,
	4, "", 4
Changing the method and the infield width by adding 10 pixels:
_method        = 9
_yPosition     = 110
_imageWidth    = 77
_imageHeight   = 85

! 3 pixels border
_infieldWidth  = 82 + 10
_infieldHeight = 90

ui_infield{3} "iSymbolType", 10, _yPosition, _infieldWidth, _infieldHeight,
	_method, "BedSymbolTypes", 4, 2,
	_infieldWidth, _infieldHeight, _imageWidth, _imageHeight,
	1, "", 1,
	2, "", 2,
	3, "", 3,
	4, "", 4
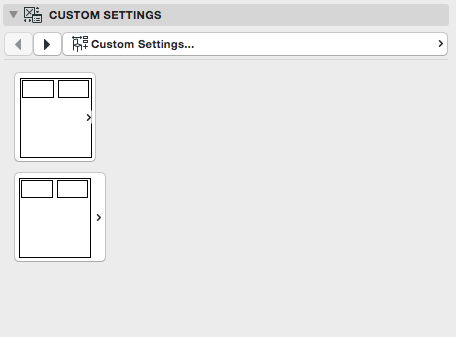
The scripts above result the following User Interface:
